The sunset ☼
La dolce vita
Hippies in the town
Print Proposal Board 2
I decided to create one more Print Proposal Board to make sure I can use all the techniques correctly.
This time I used a simple line drawing:

I found a nice pattern which I decided to use on this drawing:
 But before I used it, I duplicated/swapped it to create a new-looking pattern and here it is:

I also wanted to include some inspirational images on my Proposal Board and make the background more interesting, thus I added a cropped pattern ( Cropped by polygon lasso) .
This is one of the inspirational images I used on my board:

After all the adjustments and techniques, this is the final view of my F/W 2014-2015 Print Proposal Board:
 I enjoyed the process and sure that all the techniques used will be useful for me when creating a new Proposal Board later on.
Print Proposal Board
This is the final stage where I had to use all the techniques I learned before, such as:
– Drop Shadow, -Glow, – Edit Pattern, -Change Colour and so on.
First of all, I chose a line drawing:


Then, I had to create a repeating pattern(which I showed in my first post) and apply it on the line drawing.

After all the techniques used and explained previously, this is the final version of my Print Proposal Board which is used to present idea of a collection(Spring/Summer 2015) to anyone and give a simple look at what it is going to be about.

Illustration Experiment Continue
As mentioned before, I got interested in illustration and decided to learn more about it by trying more. First of all I did a simple one, but I use a new technique as I opened a pattern I found and made it a “defined pattern” so that the selected part of the illustration could be filled with it.
This is the pattern I found:

And this is the simple Illustration I used: 
After a variety of techniques, this is the final version of illustration:
The background was also filled as a “Defined Pattern” and its percentage appearance was changed so that it would appear nicely. I also added a gradient “fill in” to the line striped on the shorts.
Later on, I created a new illustration work. This time, I wanted it to be more complicated and to be with more details.
This is the original view of the illustration:

After using variety of techniques mentioned and used before, this is the final version I got:

All in all, I think I leavened the basic rules of changing the appearance of the illustrations and will be using them later on.
Illustration
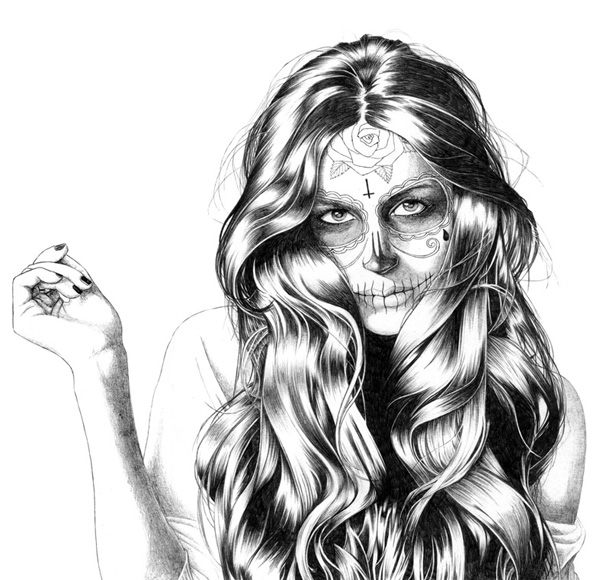
This time I had to find an image of black&white illustration in order to add some colour, texture and make it more “alive”.
This is the original image I found:
First of all, I added a pattern to a chosen part(selected by lasso previously).
 Then, I simply had to chose part by part of the illustration and add some colour as well as change its brightness and capacity to make it appear nice.
So here is the final version of my illustration:

I also made some part of the image darker and smoothed the edges by using appropriate tools.
About a week ago, I used the same template illustration and made a better version of it, but sadly I lost the photoshop-version of it, so the “JPEG” file is the only one left.

This version appears to be brighter and more accurate as I used different ways of using colour layers.
All in all, I enjoyed the process a lot and will definitely experiment more with it!
Finishing up the Concept Board
This is the last week I work on the Concept Board and it is an exciting moment as I finally get to see the final view of my work.
So, first of all, I changed the concept board a bit this time as I did not like the appearance, I included a cropped picture of Audrey Hepburn unto it and deleted some of the ones I had.
This was the new original image I used:

This is the concept board before adjusting any new techniques(however I did add one – glow of the material scanned):

I also used a variety of techniques, such as “blending mode” which allied me to change the outlook of the layer. I also chapped the “Layer opacity” which is kind of blending mode but it only changes the way one image appears comparing to another, it may be not bright(20%) or in its normal way(100%).

In this concept board I used”Fill color” for background as it is divided into 2 to make images appear in a nice way.
Then, I edited some text to identify the purpose of the concept board “F/W14” and some text to reflect the atmosphere of the board. I also Rasterized a “Bonjour” Text Layer so it appeared as a layer not as a “text”.
After all the adjustments and techniques, this is the final version of the concept board created: 
I really enjoyed using variety of techniques and applying them to my concept board and thought this is the first ever time creating something like this, I like its the final look and look forward to creating more!
Selection Colour Editing
This time we were presented the way to use a scanned image and chose a particular part of it by using a “Rectangular Marque Tool” and holding a “Shift” button. This part was used on my concept board to show some material that could be used for this project.
This is the original material scanned previously. 
And this is the Concept Board after editing a showed part of the scanned image into it. 
Then, I had to chose an image(which appeared to be a photograph made by me a year ago) and use a Polygonal Lasso Tool to crop it. This tool allows to crop an image in an accurate way.
 This is the original photo I used.
After cropping it out from the background, I smoothed the edges. Also, I used the same image to Feather the edge and then edited the color(hue/saturation) to my selection. Here is the final version of the image in a “JPEG” format: 
Also, I had to apply the knowledge I gained to the concept board, so I simply moved the image created into my concept board. 
I think this lesson was very useful as this knowledge will help create a better versions of work later on. Also, this time there were much more details while creating the concept board which made it even more interesting.
